What to know about adding solar to a van?
Adding solar to your van is a great way to become energy independent, expand your camping and parking options, and live a more comfortable lifestyle. While you may have been previously limited to paying for shore power at campgrounds, you’ll now have the freedom to park wherever you want knowing you can keep the lights on. But before you start drilling holes into the roof of your van, there’s some important considerations to keep in mind to save you trouble when you’re on the road.
What do I need to buy for solar installation for my van?
- Solar panels: Solar panels come in two main types: monocrystalline and polycrystalline. Polycrystalline panels are cheaper, but they are also less efficient. For vans with limited space, we’d recommend going with monocrystalline panels for the most bang for your buck.
- Charge Controllers: Charge controllers are often confusing when you first start researching solar components. Essentially charge controllers prevent your batteries from being overcharged by limiting the amount and rate of charge to your batteries. They also prevent battery drainage by shutting down the system if stored power falls below 50 percent capacity and charge the batteries at the correct voltage level. This helps preserve the life and health of the batteries. There are two main types: pulse width modulation charge controllers, which are simpler and less expensive, and maximum power point tracking charge controllers, which are the best option if efficiency is your highest priority.
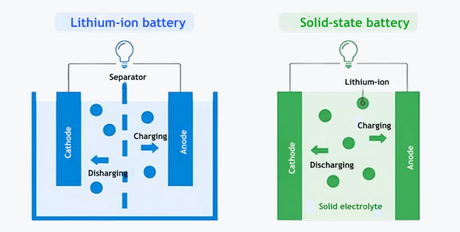
- Battery storage: There are a variety of battery options to choose from that range in price from $100 to more than $1200, depending on the technology. Lead acid batteries are the most inexpensive option and are available at most big-box and auto stores. Absorbed glass matt batteries store 10 to 15 percent more energy than lead acid batteries and charge up to four times faster. Lithium-ion batteries are the most expensive option, but also last four times longer than lead-acid batteries and weigh much less.
- Inverters: Inverters turn DC power produced from your solar panels and stored in your battery into AC power. An inverter is necessary to power the common appliances found in your RV or van, from laptops to microwaves. Inverters range from $150 to more than $350.
- Mounting Hardware and Wiring
Wiring your system can be one of the most scary components to worry about, but Renogy makes it easy to put your system together. Renogy has a range of weatherproof wires, adaptor cables, tilt mounts, and other accessories to get your system up and running.
Should I purchase roof-mounted, flexible, or folding solar panels?
- Rigid, roof-mounted panels are the most common solar panels on the market. The main benefits of rigid solar panels is that they are durable and can be mounted at angle. This increases their overall energy production efficiency. If you’re looking for a way to mount your panels to a non-flat roof, you might want to consider flexible panels.
- Flexible solar panels weigh less than the rigid solar panels and can be installed directly on the roof of your RV, in contrast to rigid solar panels which stick up above your roof somewhat and can be trickier to place between other components on your roof.
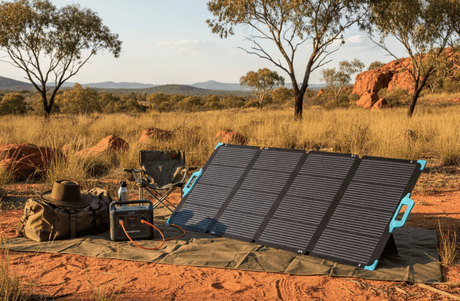
- Folding, suitcase-style solar panels are lightweight, portable, and ideal for those who are not ready to mount solar panels to their van. You can simply start collecting energy by setting the panels out where it’s sunniest and angle them to achieve optimum efficiency.
How do you set up a solar system for a van?
- Test all your components before you mount the components on your van.
- Mark the location of your solar panels and mounting points to avoid having to measure again.
- Measure twice (even three times!), drill once.
- Ask for help! Having someone to help you when you’re handling large solar panels to the roof of your van makes a huge difference and keeps you from potentially hurting yourself.
- When flipping the switch, remember that if your solar panels are connected to the charge controller, and the charge controller isn’t connected to the batteries to move the current, you could blow up the charge controller. Make sure everything is connected before turning on the system!
- Not ready to take the full solar plunge? Consider trying portable products that don’t require you to mount panels on (and drill holes into) the roof of your van.
How many solar panels do I need?
To decide how many panels you need for your van, we recommend using the Renogy solar panel calculator to help determine your specific needs. Before you input your information into the calculator, you also might want to give some thought to what you need in your space and how you could save on your energy consumption. Do you really need to operate that refrigerator? Maybe an insulated cooler will fit your needs just as well as a refrigerator. Making those adjustments to your lifestyle could save you from having to have a larger, more expensive system to meet your energy needs.
How long does it take for the solar installation to be worth its investment?
This is also a tricky question because everyone’s situation is so unique. However, there’s no doubt that having solar on your van can save you lots of money over time, especially as you don’t need to buy a gas generator or pay for camping spots with shore power.
You can assume your RV/van solar system or solar kit will pay for itself in anywhere from 18 camping days to 14 months, depending on your system size, as well as how, and where you typically camp. Not too bad.
Conclusion
Collecting and storing energy from the sun is a great way to make your lifestyle travelling or living in a van more comfortable. Whether you purchase folding solar panels or a roof-mounted solar panel kit, there’s most likely a solar product that’s perfect for you.


![What Is a DC to DC Battery Charger [Comprehensive Guide]](http://au.renogy.com/cdn/shop/articles/IMG_3829_bd86de74-31d6-49fd-b9d5-265bb723091d.jpg?v=1757582605&width=460)