When installing a new solar panel system, one component some people might initially overlook is the solar panel racks and mounts they will need to attach their solar panels to their roof or the ground. Even though these parts usually aren’t visible once everything is in place, they are crucial to functionality and longevity.
While it’s also important to research and understand other components like solar panels and battery chargers for PV systems, it’s worth taking some time to read up on solar panel mounts and racks. That way, you know you’ve got everything you need for the best solar panel installation.
What Is a Solar Racking System?
Solar racking systems are what mount solar panels onto rooftops or the ground safely and securely. Most solar companies will have their own preferred solar panel racks or mounts they recommend, but various brands are available.
Most solar racking systems are primarily made from aluminium since it is lightweight yet durable enough to be reliable. Every solar racking system comes with various components, which will get into more details further down the page.
How Much Does a Solar Racking System Cost?
Solar racks and solar mounts are essential to any solar installation, yet they are some of the least expensive components. On average, you can expect to pay around AUD 0.13 per watt (W) for solar mounting solutions here in Australia.
In other words, if you install a solar PV system that generates 300W on average, you can budget that your racking solution will cost only about AUD 40. Another way to look at it would be that if you were to take the overall system cost, your racking system should probably not exceed more than 3% of the total.
Solar Racking Components
Most solar panel kits come with all of the essentials, but if you want solar panel racks or mounts, you’ll have to purchase them separately. The main reason for this is because different setups require different hardware, so it doesn’t make sense to include only one type of solar racking in a kit.
Having said that, there are some components that essentially all mounting systems utilise, which we explain below.
Flashings
Solar installers will have to create drill holes in the roof for roof-mounted systems to attach the solar modules. Flashings act like caps for these newly formed holes and look like little metal rectangles. They stop any leaks from happening, so you don’t have to worry about water damage, and they act as barriers against pest infestations, so no need to concern yourself with Aussie creatures getting into your home or business.
While flashings are vital for almost every roof-mounted system, the type of flashing you need depends on the kind of material from which your roof is made. Thankfully, all roof types, such as metal, tile, rubber, or wood, will have a flashing option to go with it.
Mounts
The holes that solar installers drill into your roof serve a purpose: to allow a sturdy bolt to be secured to the internal structure, such as a rafter. To securely attach the solar panels to these bolts, installers use mounts. You can think of them as the connecting points between your building and the solar panels, and they kind of look like the feet of the flashings.
Before installing anything, solar installers will likely want to see the inside of your building to determine how the roofing system is accessible from indoors and the best way to effectively install the bolts and mounts.
Rails
After the mounts are the rails. As you can probably imagine, these components look like railroad tracks running across your roof. They can be attached either vertically or horizontally and usually are made from aluminium. Aside from providing a dedicated space for the solar panels to rest on, rails are also great for running any wiring throughout the system.
Clamps
One other critical component of any solar racking system is the clamp. Clamps keep your solar panels firmly in place on the railings. They can be placed between panels, known as mid-clamps, or on the ends of rows of panels, known as end-clamps.
End-clamps are larger than mid-clamps, but you don’t need as many of them in most cases. If you’re considering a DIY solar installation project, take some time to decide whether mid-clamps or end-clamps best meet your design needs.
Types of Solar Panel Mounts
Although most people opt for roof mounting when installing their solar energy system, another standard option is ground mounting. This alternative is another reason solar panel mounts and racks frequently are a “sold-separately” component.
Let’s go through all of the solar panel mounts available out there to get a sense of what setup will be ideal for your circumstances.
Roof Mounts
Generally speaking, roof mounts are the most economical option as they utilise your roof as the foundation of their design, which means lower costs for materials and labour. Roof-mounted solar panels are also convenient in that once set up, they’re out of the way, and you don’t have to think about them too much.
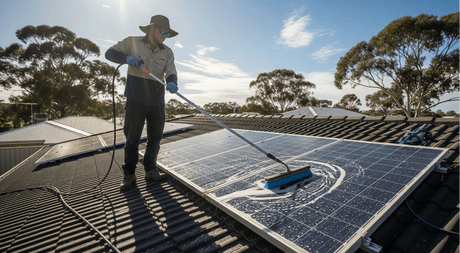
The potential downside of roof mounts is they can be more challenging to maintain since they are up on your roof. For instance, if they need cleaning or service, it’s going to be a more involved process than if you had ground-mounted solar panels that are easy to reach.
Mounting systems can include different features to assist with ideally angling your solar panels and ensuring they maximise output to accommodate for various roof styles and designs.
Fixed Roof Mounts
For most pitched roofs, fixed roof mounts are the way to go. These are the most traditional mounting systems designed mainly for angled roofs, meaning they require the least amount of hardware since your roof already creates a reasonable tilt toward the sun. Once your solar panels are installed in the best direction and angle, your solar energy system should be pretty self-sufficient.
Tilt Legs
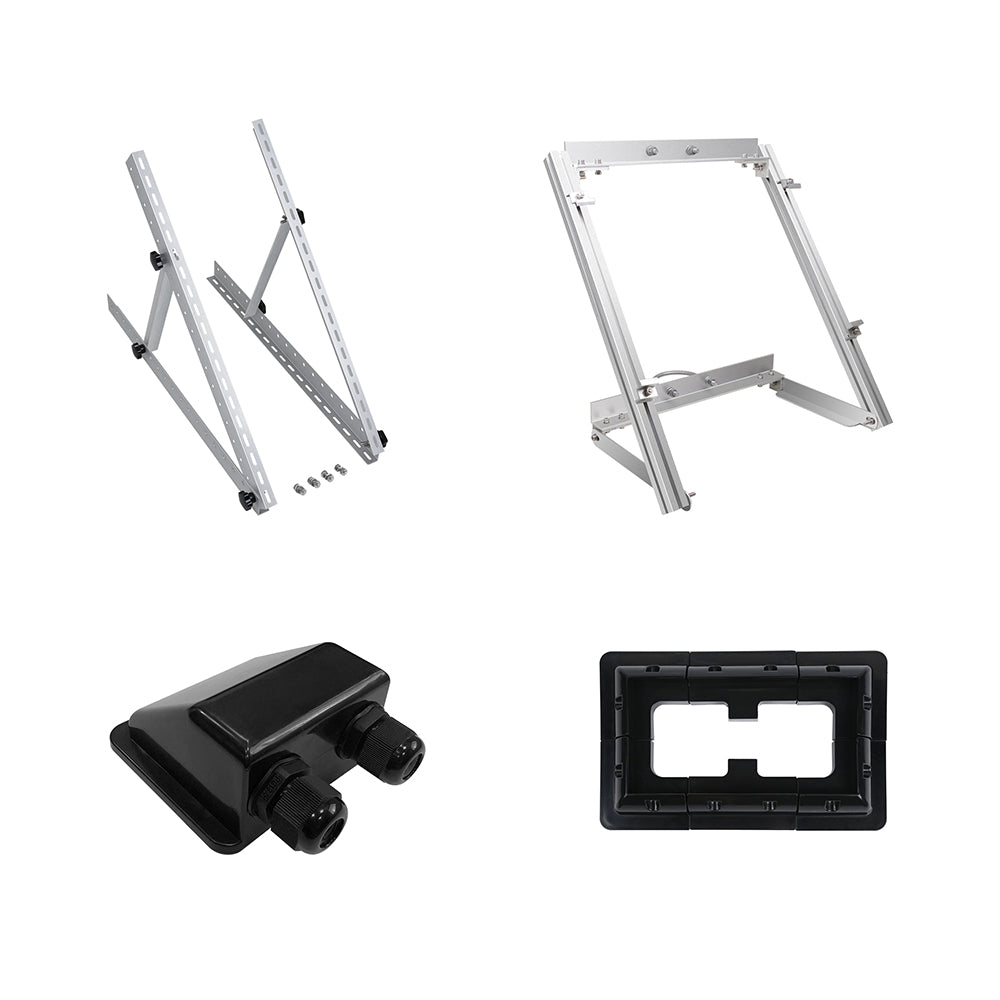
If your property has a flat roof or isn’t quite angled how you need it for maximum sun exposure, a simple solution is to add tilt legs to your mounting system. With these pieces of hardware, your solar installers will determine the exact tilt angles your solar panels need and set up the tilt legs to create the perfect setting.
In most cases with roof mounting, the legs have a fixed tilt, meaning you can’t adjust them on a whim. However, it may still be possible to have the professionals come out and make adjustments if you notice your system isn’t producing as much solar energy as it could be.
To get a sense of how to tilt your solar panels, you want them to face toward the Equator as directly as possible. This means that in Australia, you would face your panels toward true (not magnetic) north. To find true north, you would take your compass reading (magnetic north) and apply your location’s magnetic declination, which you can find online.
If your magnetic declination is east (positive), you should rotate your solar panels that many degrees to the west in the Southern Hemisphere. If it’s west (negative), you will turn them that many degrees east. Once you do this, your panels are now facing true north.
To ensure the optimal tilt angle of your panels, the easiest thing to do is to angle your panels the same number of degrees as your location’s latitude. For instance, Sydney is at about 34°S of the Equator, meaning Sydneysiders would tilt their panels at a 34° angle.
Ballasted (Zero Penetration) Roof Mounts
Perhaps you have a flat roof and don’t want to hassle with tilt legs, or maybe you don’t have permission to go drilling a bunch of holes into a property’s roof but still want to install solar panels for energy efficiency. In scenarios like these, you still have the option to mount solar panels on the roof by using ballasted or zero penetration solar roof mounts.
This design uses the solar panels’ weight along with concrete blocks to hold everything in place. Ballasted roof mounts are popular for utility-scale systems placed on flat rooftops as well as rental properties.
Ground Mounts
Another common mounting method for utility-scale solar energy setups is relying on ground mounting. Ground-mounted systems are flexible in that they can be installed just about anywhere on the property since they go into the ground. This design requires installers to either dig holes and pour concrete or create a large cement slab somewhere on the property for the panels to rest safely.
One significant advantage of ground-mounted systems is they make solar panels maintenance simple and within reach. However, they will take up a fair amount of space on your property, so you want to consider where to place them that won’t cause issues.
Fixed Ground Mounts
As the name implies, fixed ground mounts are permanently installed on a concrete slab on your property. They are mounted all together on a metal frame at the ideal fixed tilt angle. Sometimes, instead of a concrete slab, installers will create large holes filled with cement to fix the metal frame’s legs into the ground securely. Either way, fixed ground mounts generally are a quick-mount PV system solution that works well for large properties.
Pole Mounts
Another ground-mounted option you have is to install individual solar panels on poles that are placed firmly into the ground. The benefit of this kind of setup is that each panel can be precisely angled toward true north as well as tilted to the perfect degree for peak performance. It’s also helpful to separate the panels if there are maintenance issues since just one panel would be affected rather than the whole system. However, pole mounts can be more costly as it requires more hardware and labour to get each panel set up correctly.
Trackers
One additional feature of solar panel racks and mounts to look into is trackers. Trackers are easy to install on pole mounts and do an excellent job of monitoring the conditions of each panel. Trackers use IoT monitoring to automatically adjust your solar panels for maximum solar absorption. You can even be notified when a panel malfunctions or necessitates cleaning due to dust or other buildups on the PV cells.
While trackers can be a lot of fun, they may not be necessary for most residential solar designs. They do come in handy if you have very limited space that you’re trying to make the most of or in large-scale utility settings that would greatly benefit from even minor tweaks in the system. Otherwise, to get the same level of additional output trackers may provide, you’re probably better off just adding another panel or two to your system.
DIY Solar Mounting
Now that you’re familiar with solar panel mounts and racking systems, you may feel inclined to consider mounting your solar panels yourself. While some projects around the house are DIY-worthy, solar installation likely isn’t one of them. Not only are solar panels and their various components not cheap, but designing and placing the system takes a level of skill and knowledge that most individuals don’t have.
Instead of trying to tackle the job on your own, it’s better to do some research on solar installers in your area and see which option suits you best. Even if you go in the ground-mounted direction for your solar panels, you’ll still need access to some heavy equipment and electrical know-how to hook everything up correctly.
Solar Panel Mounts, Racks, and More
In the world of renewable energy, solar energy systems are an easily accessible option for many Australians looking to improve their home or company’s energy efficiency. In addition to purchasing the right amount of solar panels for optimal energy output, investing in solar panels also requires selecting racks and mounts and other components like charge controllers, batteries, and inverters. Even though it may seem like a lot at first, solar companies and solar installers can make the process go smoothly and have your system up and running in no time.



![What Is a DC to DC Battery Charger [Comprehensive Guide]](http://au.renogy.com/cdn/shop/articles/IMG_3829_bd86de74-31d6-49fd-b9d5-265bb723091d.jpg?v=1757582605&width=460)
